
How to Install Battery Cable Connectors for Reliable Power Delivery
Step-by-step tutorial on installing battery cable connectors to ensure optimal electrical conductivity and safety.
In the dynamic world of automotive and industrial applications, ensuring continuous power delivery is all about attention to detail. The secret lies in properly installing your battery cable connectors. Whether you’re a professional mechanic or a weekend warrior tackling a DIY project, learning how to install battery cables correctly can help you prevent voltage drops, reduce terminal corrosion, and extend the life of your entire battery system.
Table of Contents
- Understanding the Basics of Battery Cable Connectors
- Tools and Materials Needed
- Step-by-Step Guide to Installing Battery Cable Connectors
- Common Problems and Solutions
- Related Resources
Understanding the Basics of Battery Cable Connectors
Battery cable connectors are the crucial link that transfers electrical power from your battery to the rest of the vehicle’s electrical system. Popular types include ring lugs and split-bolt connectors, available in both insulated and non-insulated versions. Choosing the right connector not only ensures reliable electrical conductivity but also protects against common issues like battery terminal corrosion.
For detailed guidance on lug selection and crimping best practices, visit our Cable Terminal Category Overview.
Tools and Materials Needed
Gather the following tools before you begin your installation:
- Wire stripper
- Hydraulic or ratcheting crimper
- Calibrated torque wrench (0–15 ft-lb)
- Heat gun and heat-shrink tubing
- Dielectric grease or anti-corrosion gel
- Insulated gloves and safety glasses
- Acid-resistant clothing
Volt Comp Products:
- Copper HT Lugs with 2 Holes, Long Rounded Palm
- Tinned Copper Ring-Type Cable Terminal Ends
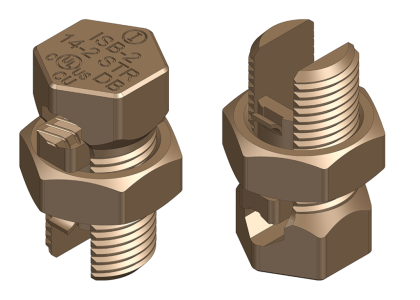
- Copper Split-Bolt Connectors – Tin Plated
- Crimping-Type Copper Tubular Cable Terminal Ends
- U-Bolt Road-to-Cable Clamp Type – SCE (Grounding Clamp)
Step-by-Step Guide to Installing Battery Cable Connectors
Step 1: Safety First
Begin by de-energizing the battery and disconnecting the negative terminal first to eliminate any risk of short circuits. Always wear insulated gloves and safety glasses for protection.
Step 2: Stripping and Crimping
Strip back ⅜″–½″ of insulation using your wire stripper. Insert the conductor fully into the connector’s barrel and use your hydraulic or ratcheting crimper to make a firm, even crimp. For extra vibration resistance, you can add a small solder bead inside the lug.
Step 3: Torque Specifications
Correct torque prevents loose or over-tightened connections. Apply 5–8 ft-lb (60–96 in-lb) for standard vehicle terminals and 95–105 in-lb (7.9–8.8 ft-lb) for deep-cycle batteries. Always consult the connector manufacturer’s specifications.
Step 4: Insulation and Corrosion Prevention
Slide heat-shrink tubing over the crimped connector and activate it with your heat gun. Finish by applying a thin layer of dielectric grease to the terminal surface to seal out moisture and prevent corrosion over time.
Step 5: Testing and Verification
Conduct a pull-test on each connection to ensure mechanical strength. Use a multimeter to confirm the voltage drop is below 0.2 V under load. Re-check and re-torque all connections after 24 hours and then every 6–12 months as part of routine maintenance.
Common Problems and Solutions
- Over-stripping: Only expose the specified conductor length to avoid weak crimps.
- Under-crimping: Ensure full die closure in your crimper for a reliable connection.
- Over-torquing: Always use a calibrated torque wrench to avoid damaging connectors.
- Neglecting corrosion inhibitors: A lack of dielectric grease can accelerate terminal oxidation.
Related Resources